Turn a SRAM Shifter into a Dropper Post Lever in 5 Steps
If you like this post, go ahead and visit my blog: www.bikeblogordie.com
I'm not the first person to figure this trick out, but I'll take credit if this happens to be the first guide that pops up on a Google search. This is Part II of an article series I'm writing for Bicycle Times.

Why do I want need to modify my shifter?
Because if you try running a dropper on an un-adapted shifter the post won't hold its position when you drop it down.
WHAT YOU WILL NEED:
- A small Philips head screw driver.
- A thin spoke that's been ground to a point, or similar pokey device.
- A small flathead screwdriver or chisel.
- A NEW SRAM drop-bar shifter (You'll want a new one in case you screw up so that you can say it just broke on its own and you need a warranty and can you send it overnight? Thanks.) You can use anything between APEX and RED – they all work the same.
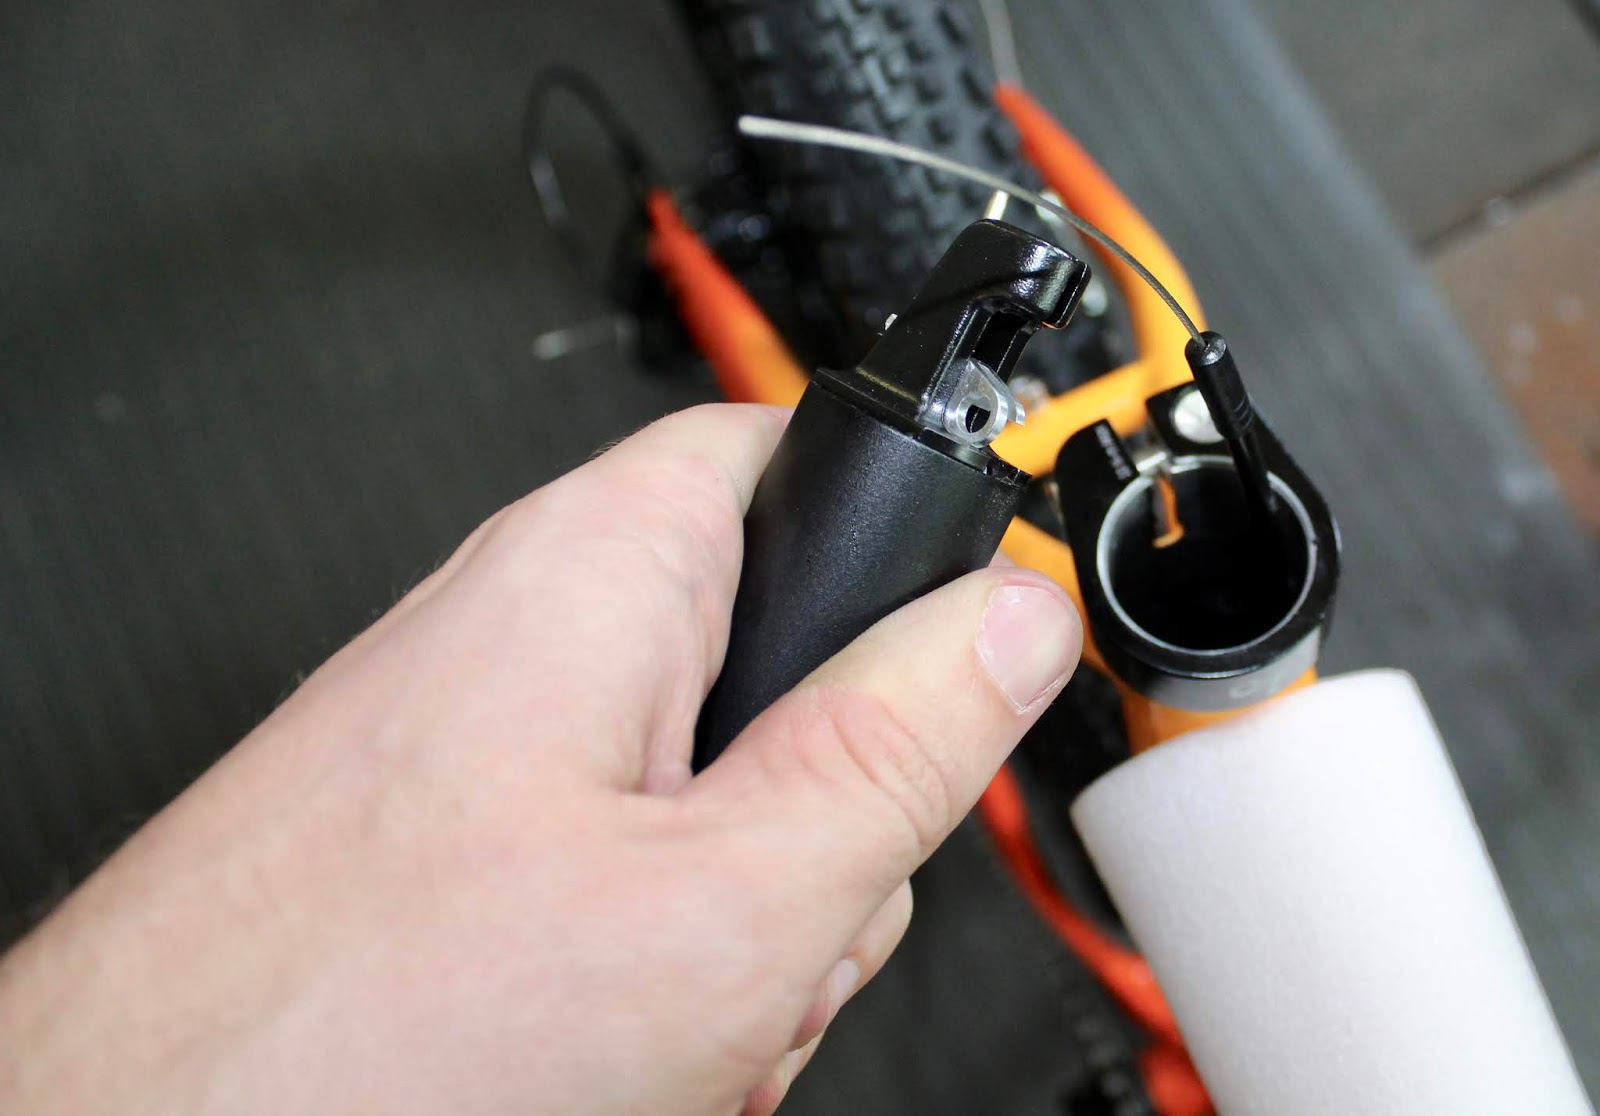
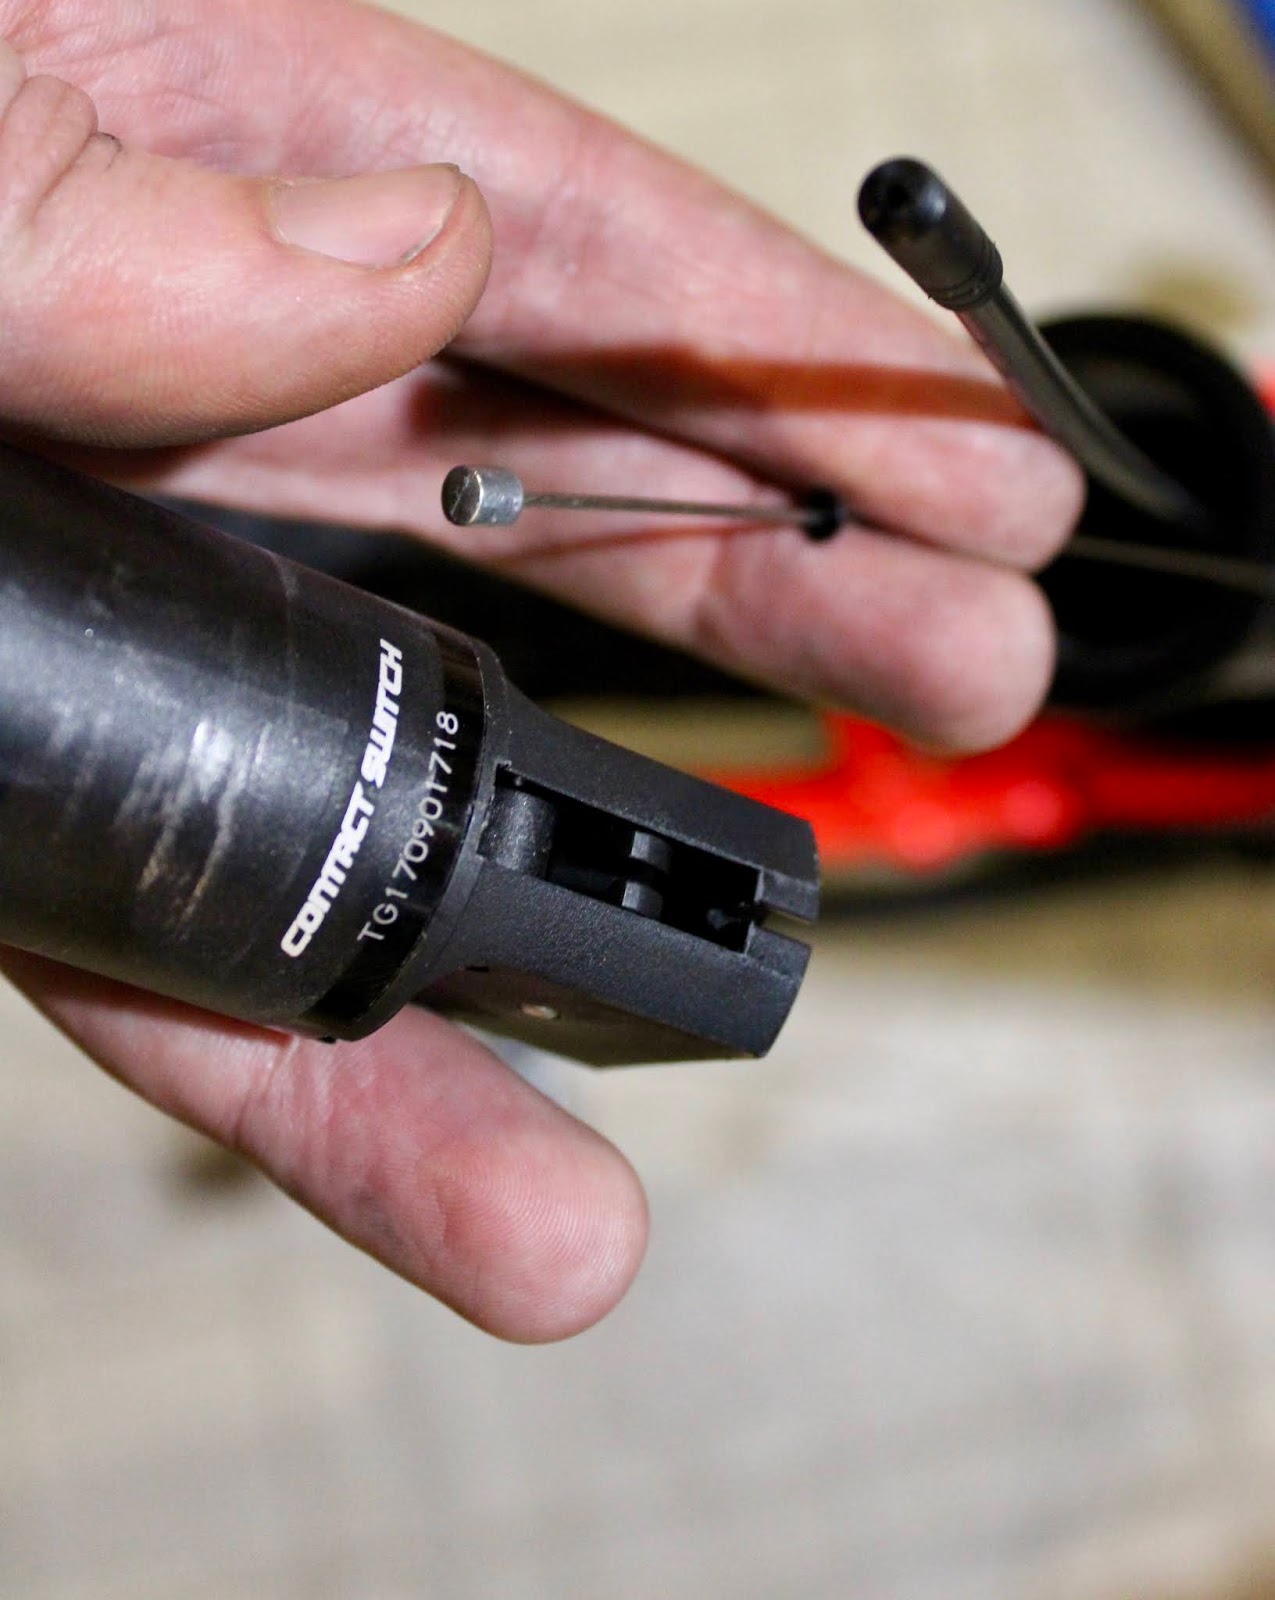
- A Dropper seat post designed to pinch the cable at the post's control switch, as opposed to the kind that requires the cable head at the switch. "KS" brand posts work well for this, "Giant" brand posts do not.
- Cable cutters and grease and hex wrenches and towels and whatever basic bike tools you need to finish the job, which will vary according the the brand and specific components you're using.
|
This KS post pinches the cable at the control switch |
|
This Giant branded post requires the cable head to go into the control switch |
STEPS
FIRST: Remove the rubber brake hood by rolling it off the front with your big muscles. You can inject rubbing alcohol as lube to make it easier. Then, use your Philips head screwdriver to open the inner face of the shifter.


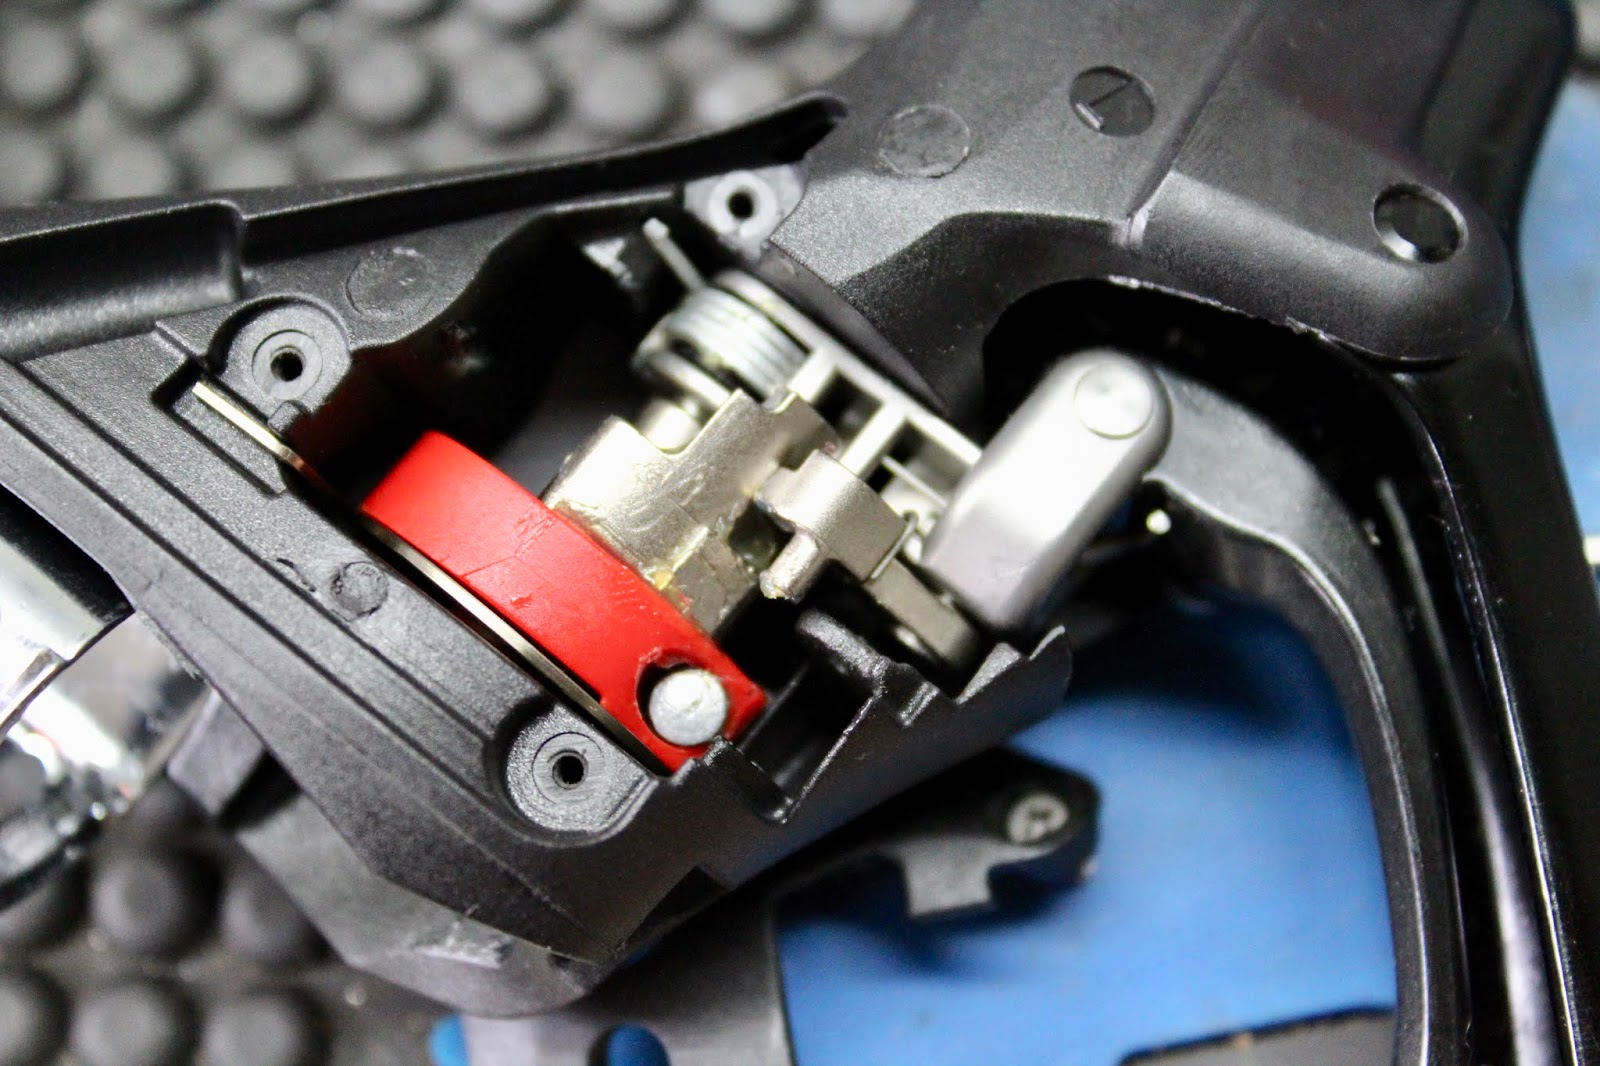
SECOND: If you play with the shift lever a little, you'll notice a spring-loaded ratchet mechanism mounted at the bottom of the body. This is what you want to remove. In front of the spring, ratchet mechanism, and body mount is a little C-clip. It's hard to get to, so I use my pokey tool to turn it around for easier access.
|
Circled in green, the C-clip can be spun in place for easier access. |
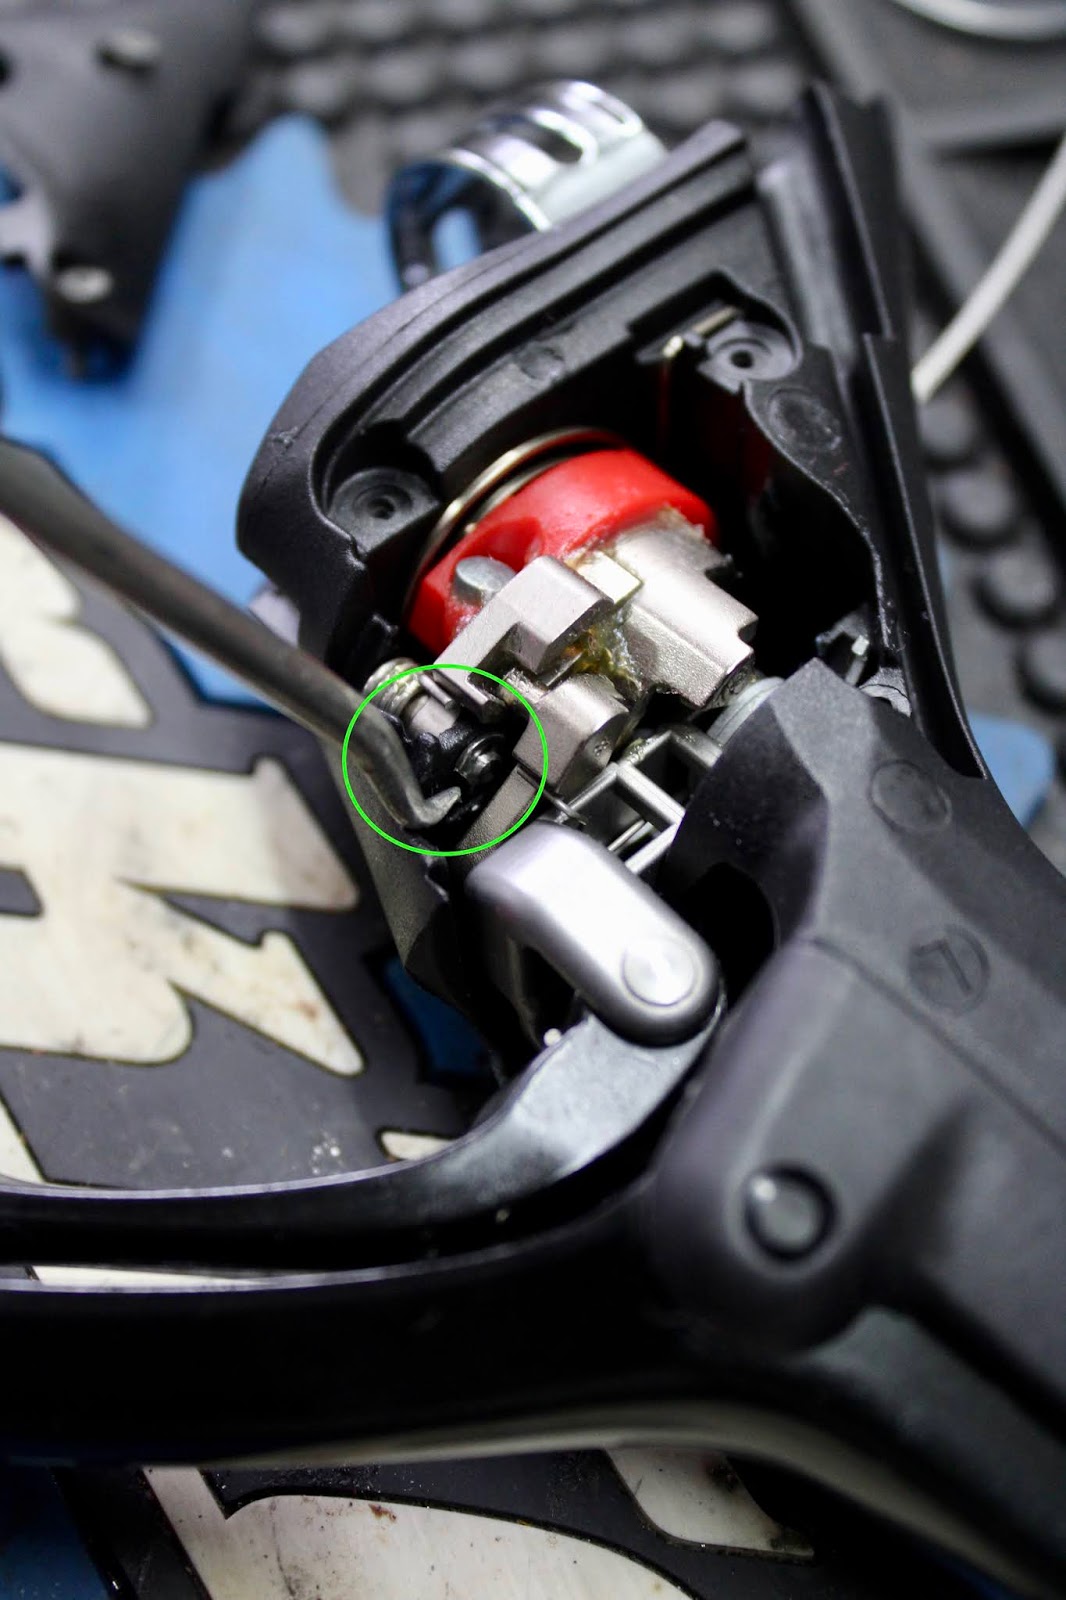
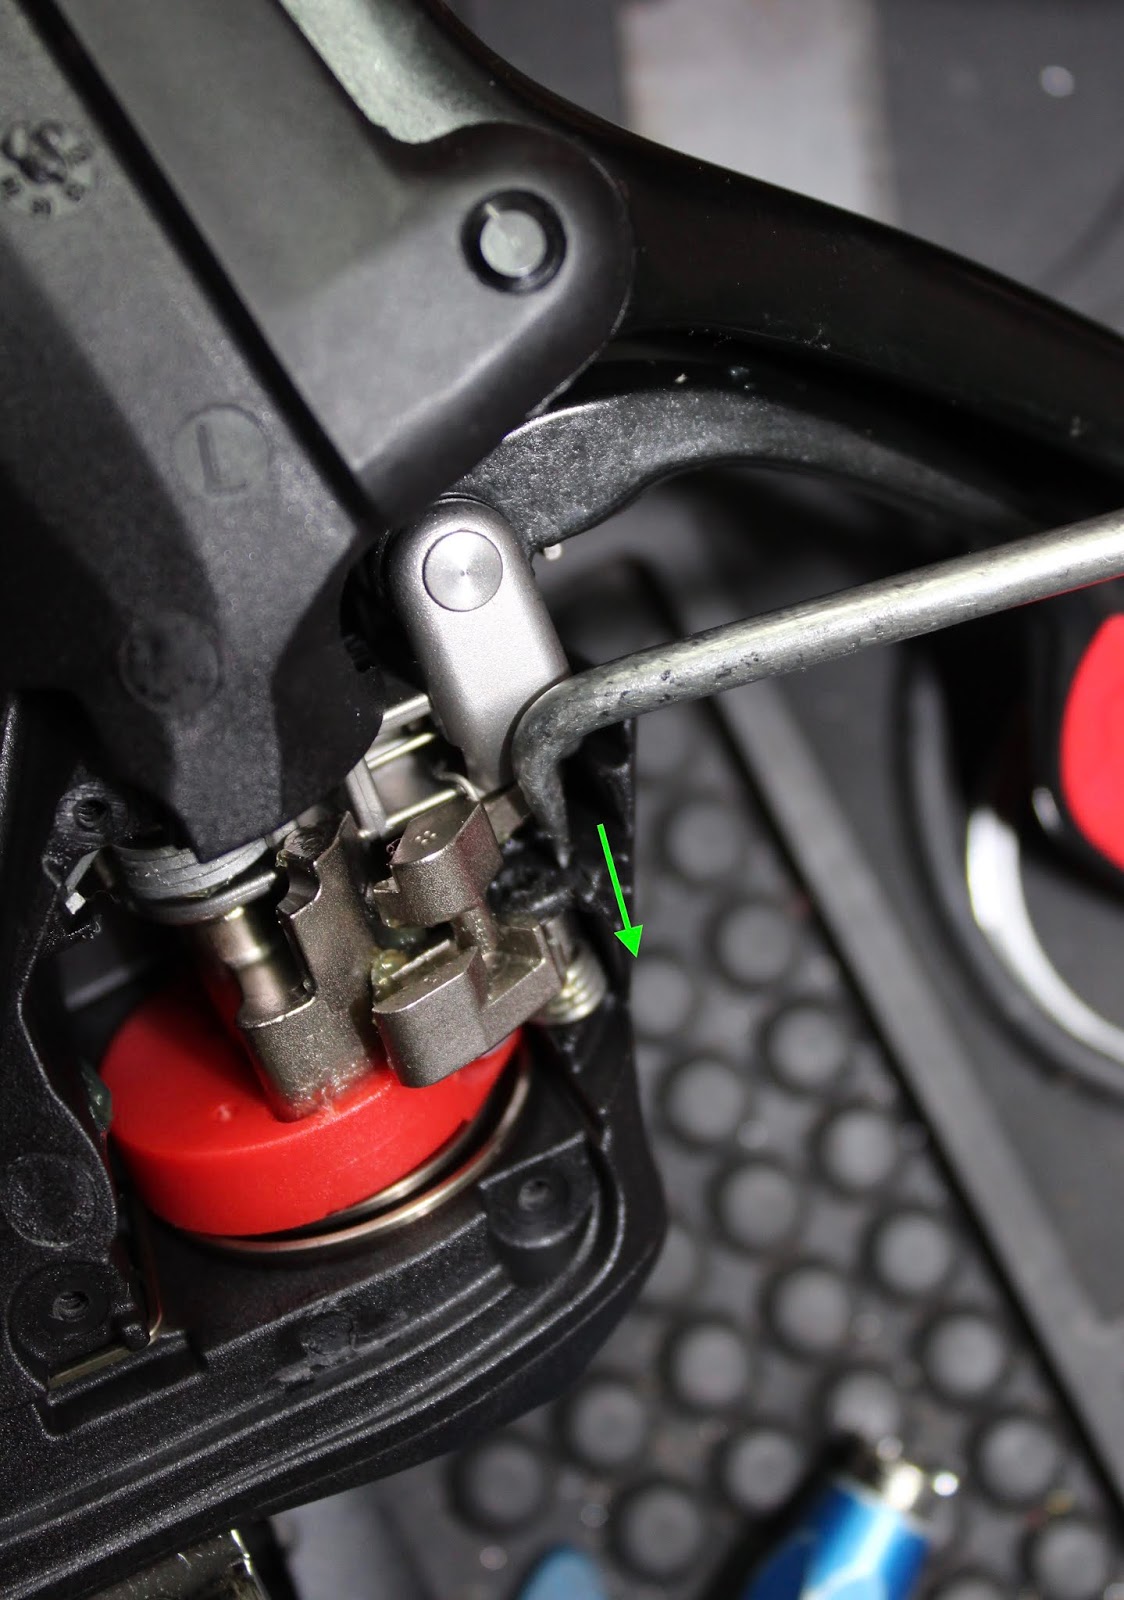
THIRD: There are several ways to remove the C-clip. I found it easiest to spin the clip so the open end faced me, then I used my small flathead to push it off the peg.
- PRO TIP: When you push the C-clip off, it will likely spring off to the netherworld. Prevent this by surrounding the clip with grease to catch it mid-trajectory. Also, attach a powerful magnet to your screwdriver or pokey tool to pull the C-clip out of the grease. Then use Q-tips to clean the mess up.
FORTH: With the C-clip off, you can push the retention pin out the back of the lever. Put a 90 degree bend near the end of your pokey tool, and ease the pin out. Again, watch out for the spring, it will likely try to bounce away. If the pin doesn't come out easily, drop some thin lube around it, then use a more robust pokey tool, like a nail and small hammer. If it still won't come out then you're probably banging on the wrong end, ya dummy.
FIFTH: Screw the face plate back on and admire your work. It's really that easy.
|
Here's how the shifter looks without the ratchet. |
|
These are the troublemakers. |

EXTRA CREDIT: When you do your final installation (click here for tips on how to do that), try to route your cable in such a way as to make it look clean, but also allow the post to move up and down with your growing little legs. Depending on brand and frame style, this can be a process of trial-and-error. Expect to spend more time prepping and installing your seat post than modifying your shifter. Don't be surprised if you ruin a cable or two. If you've never installed a dropper post before, oh boy, get ready for a long afternoon of learning.


Thanks to BFF Bikes for letting me use their bench and tools and generally putting up with me.
Views: 303
Groups
-
Chicagoland Beer Explora…
203 members
-
Wednesday Night for Mort…
1 member
-
Great Lakes Ultra Cycling
270 members
-

Major Taylor Internation…
1 member
-
Critical Mass discussion
261 members
© 2008-2016 The Chainlink Community, L.L.C.
Powered by
![]()